
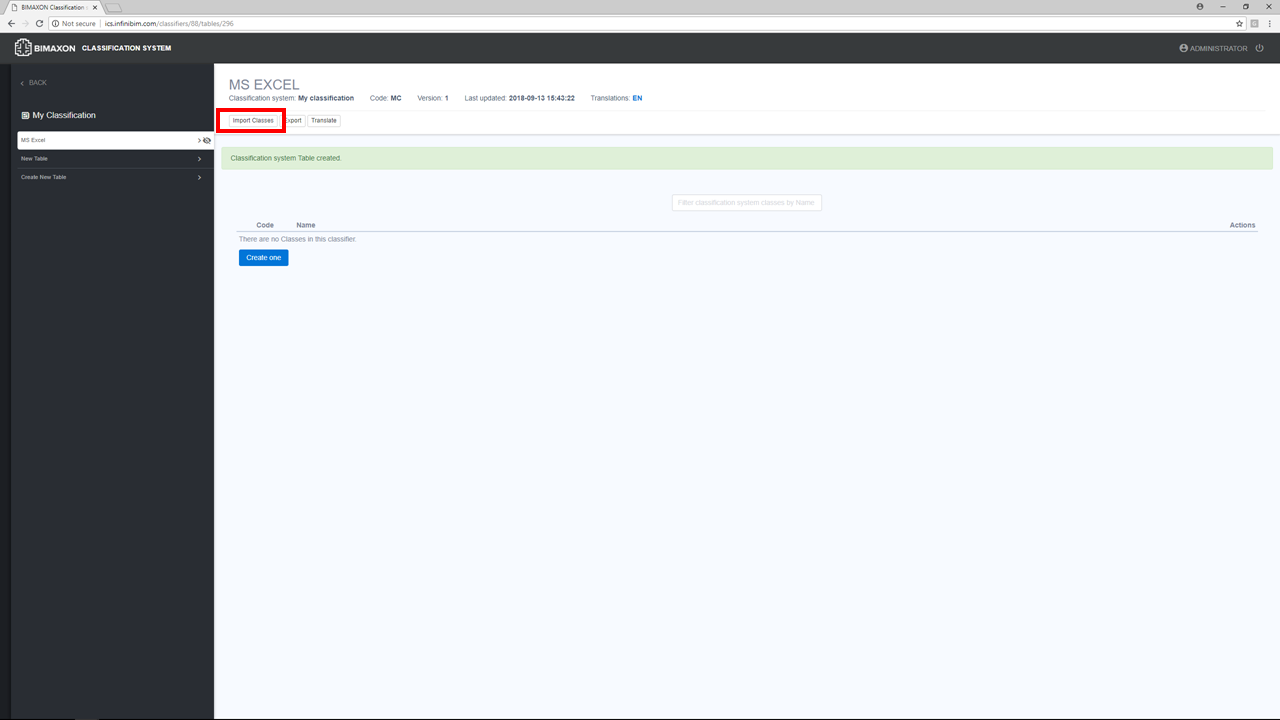
To begin, go the “MS Excel” screen in the classification system where you want to add a table and click the ![]() button.
button.
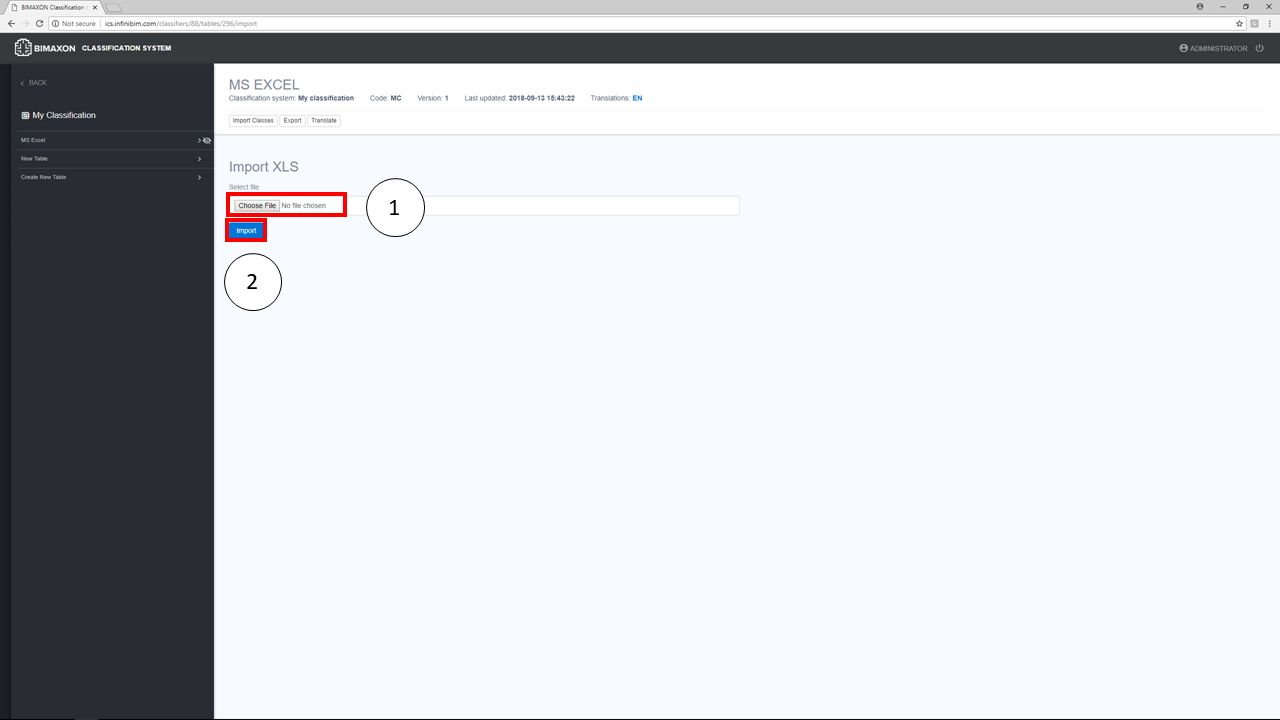
- Now click
 and find the correct Excel file on your computer.
 - Then click the
 button.
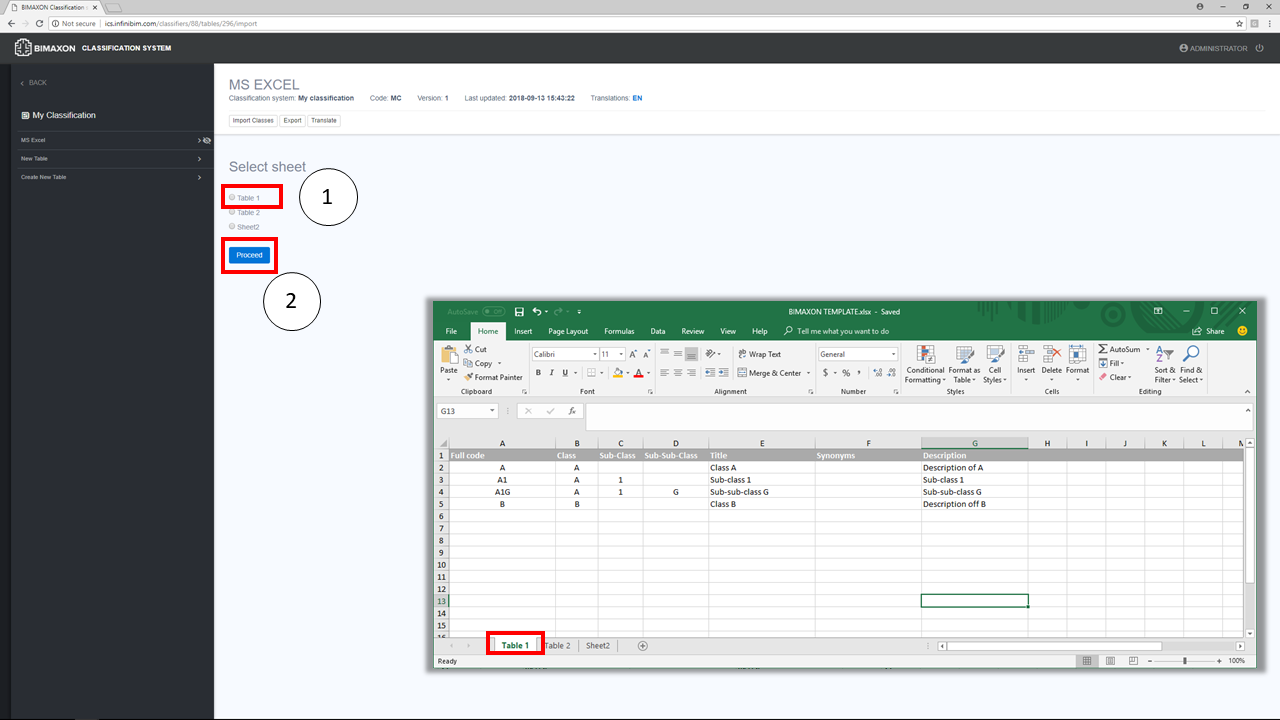
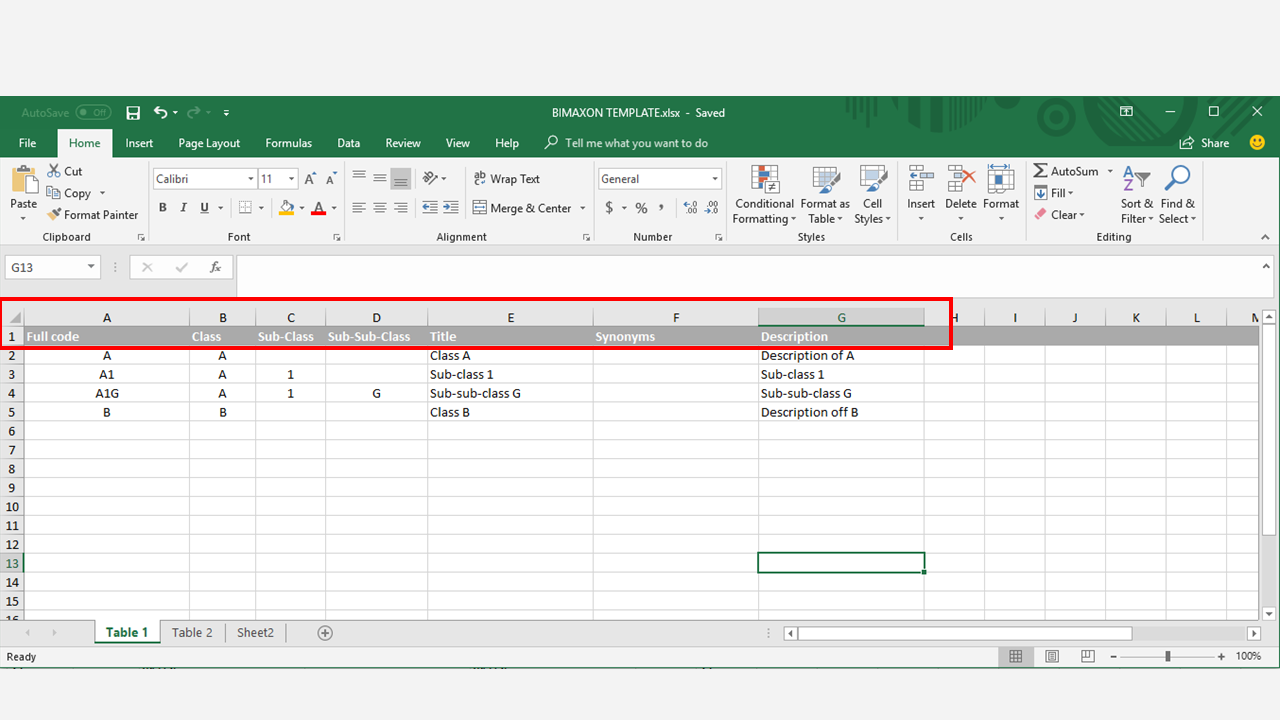
- Now specify which sheet in the Excel file has the table to be imported. In this example, we want to import the worksheet named “Table 1”.
- Then click the
 button.
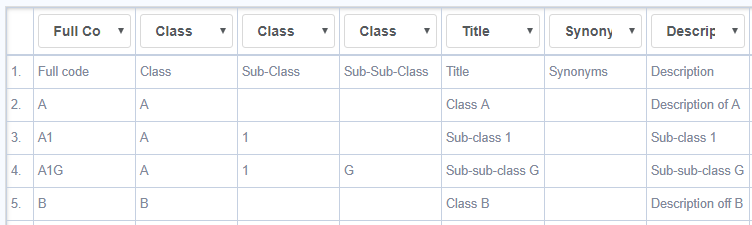
To properly map the columns in the Excel worksheet, each one’s field type must be specified. BIMAXON ICS has five field types:

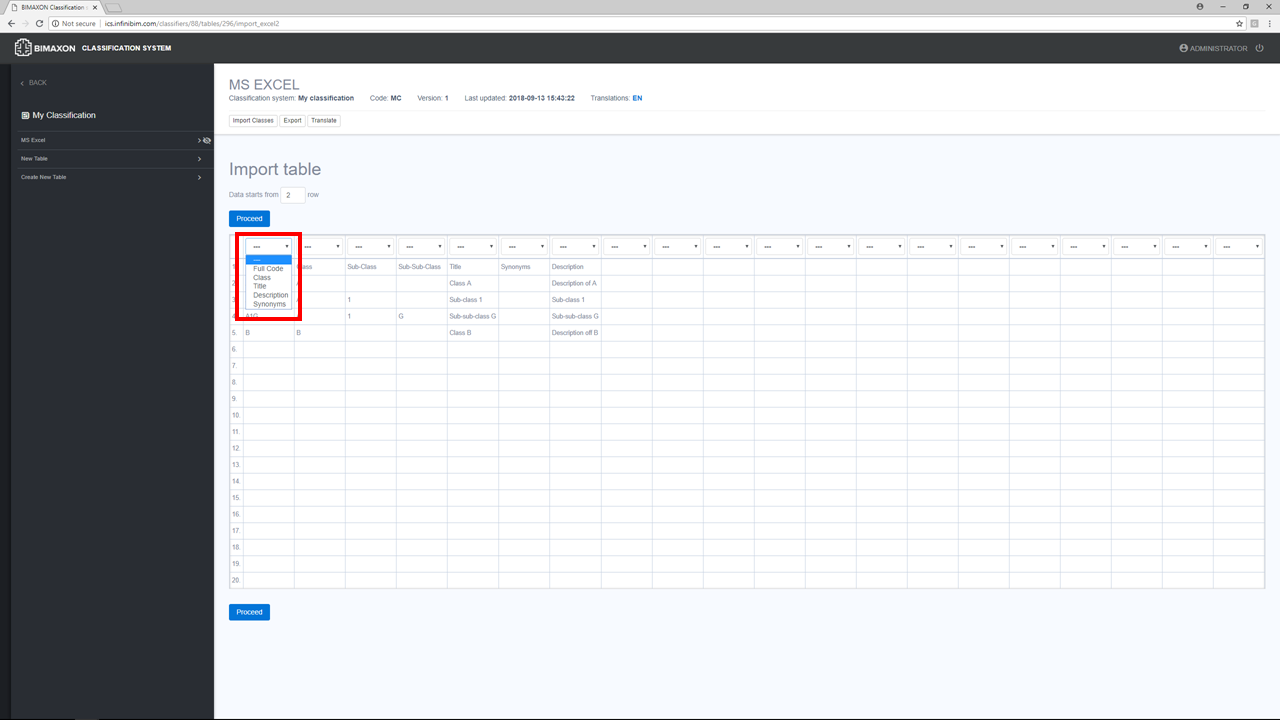
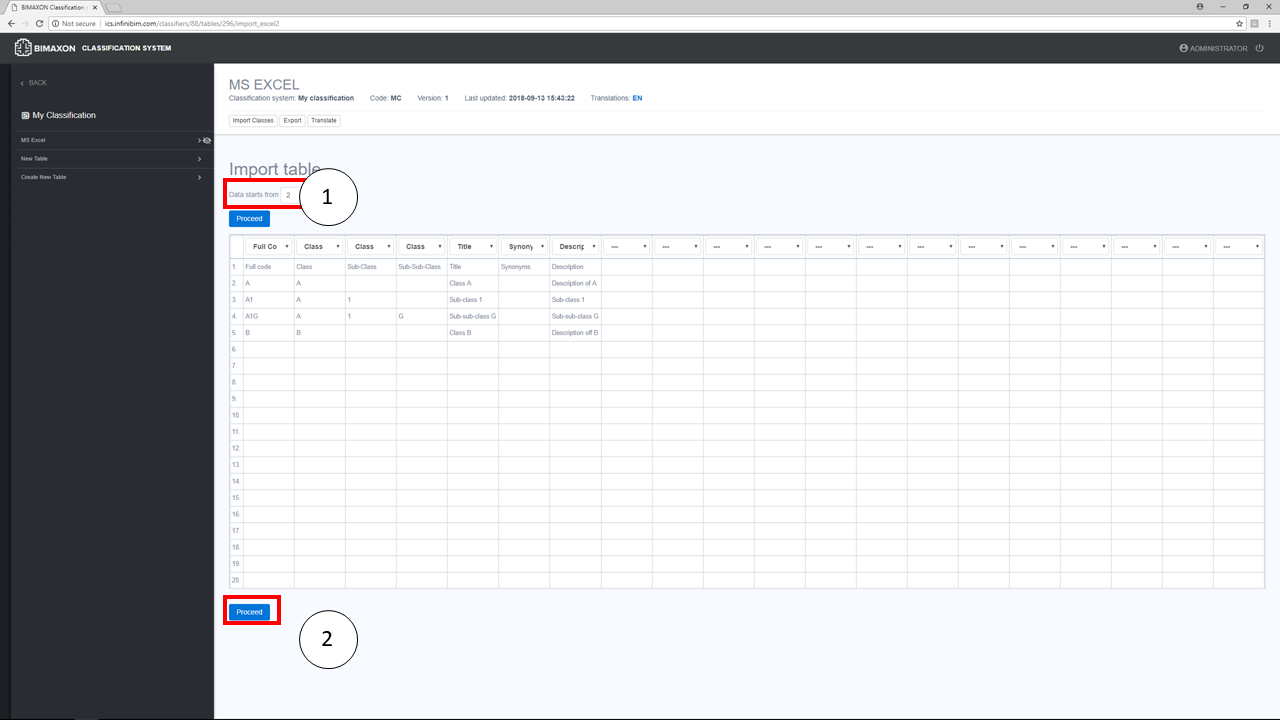
- Finally, specify the row number where your classification data starts in the Excel worksheet.

- And click to finish importing.
To create a hierarchical structure, BIMAXON ICS reads classification codes from the left to the right, as shown in the figure below. That is the first coding principle.

The second principle is that for each item in the table, there must be a corresponding parent code.

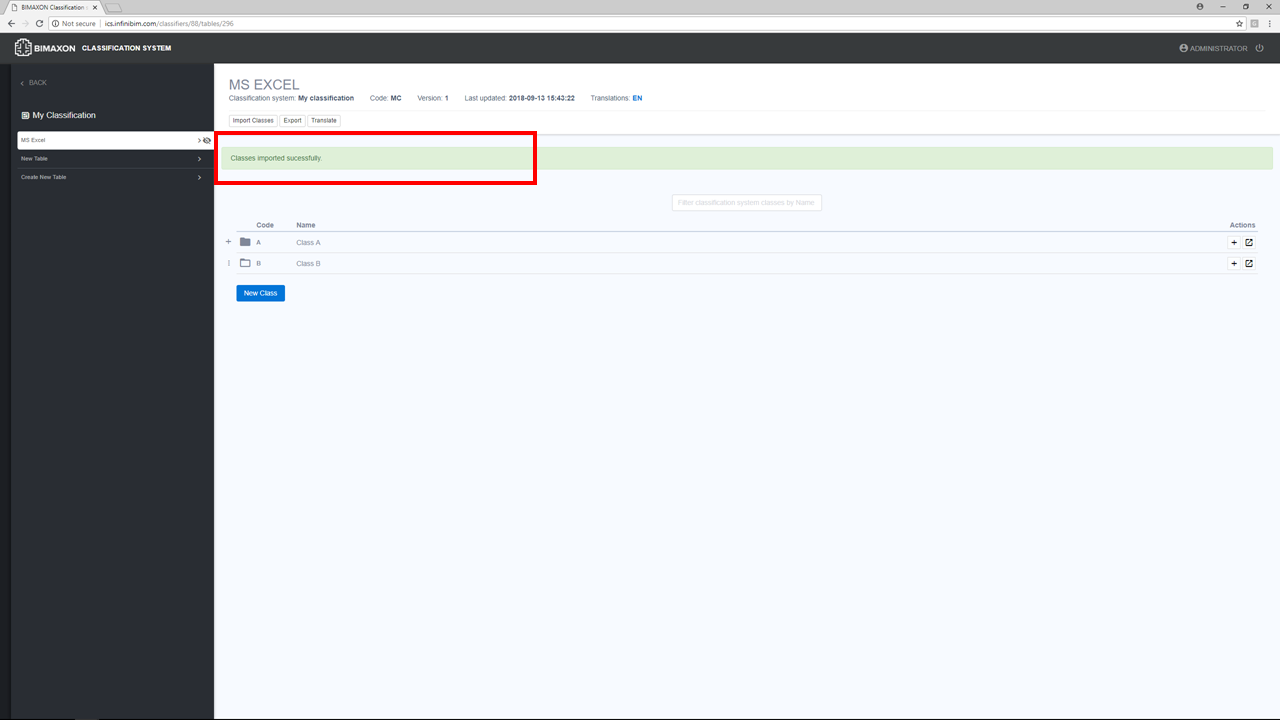
For the example shown, the final result should look like this:

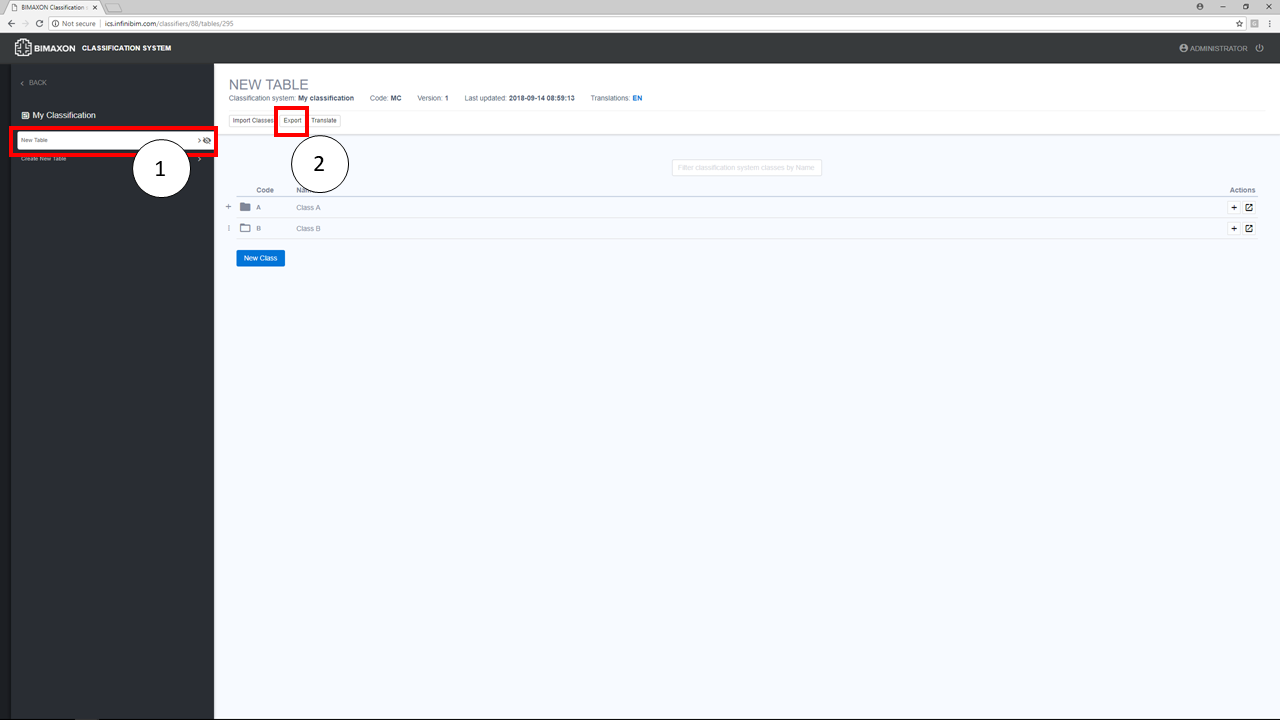
- In the relevant classification system, select the table you want to export in the left side navigation menu.
- Then simply click the
 button to export the table to a Microsoft Excel file.