Extension for Autodesk® NavisWorks®

To begin, download the msi installation file:

BIMAXON ICS for Navisworks 

It supports the 32-bit and 64-bit versions of Autodesk® Navisworks® Manage (2018 – 2023) and Autodesk® Navisworks® Simulate (2018 – 2023), on the MS Windows® 11, Windows® 10, MS Windows® 8.1, MS Windows® 8 or MS Windows® 7 operating systems. The language is English.

Double click on the installation file to start the setup process. Then just follow the instructions in the installation wizard to complete the installation.

After installation is complete, launch Navisworks and open any project.

1. Go to the View tab.

2. Expand the “Dockable Windows” list.

3. Select the BIMAXON ICS dockable window to open it.

4. Click to Connect to the ICS server.

5. Enter your login details.

6. Check “Remember me” if you wish, to store login details, and then click the login button.

1. Choose a classification system from the drop-down list.

2. Then select a table in that classification system from the drop-down list

3. Browse the tree structure to find the class you are looking for and select it.

4. At this point you have a three options:


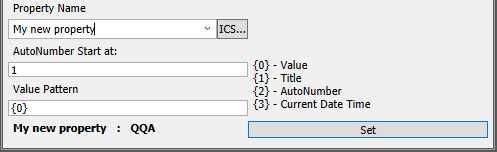
a) You can create a new property manually by entering the name of the new property.

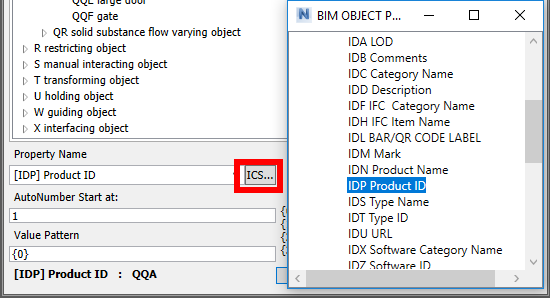
b) You can select a property from BIMAXON properties list by clicking the button.

c) Or you can select an existing property from the drop-down list.
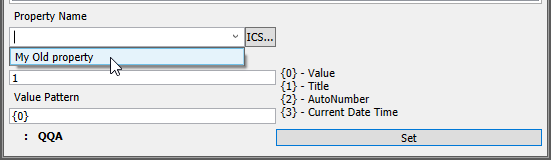
NOTE! 
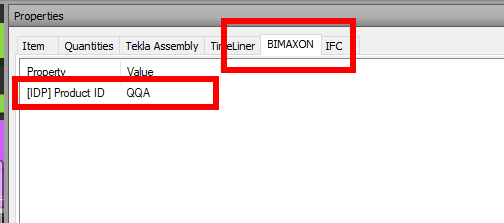
1) Any new property will be created under the BIMAXON group of properties (a tab in the properties window).

 2) When changing an existing property, the value will be updated for all selected elements. If any selected elements do not have the property, it will be added.
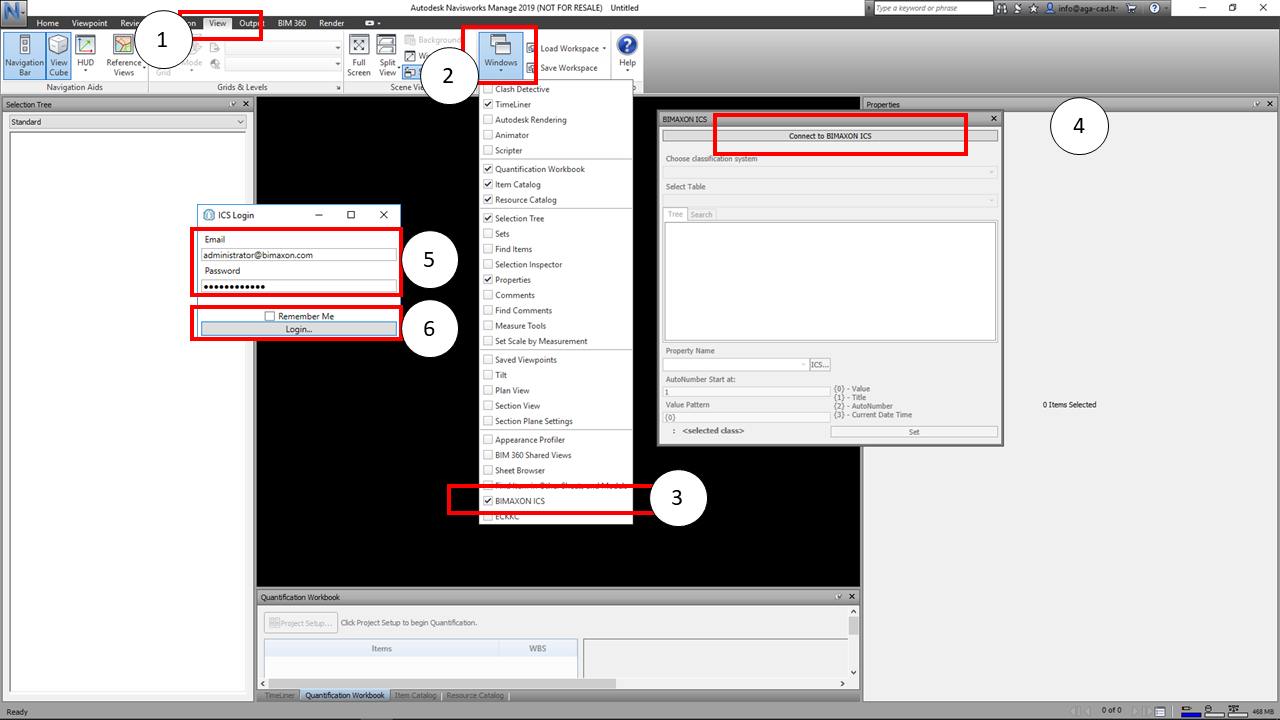
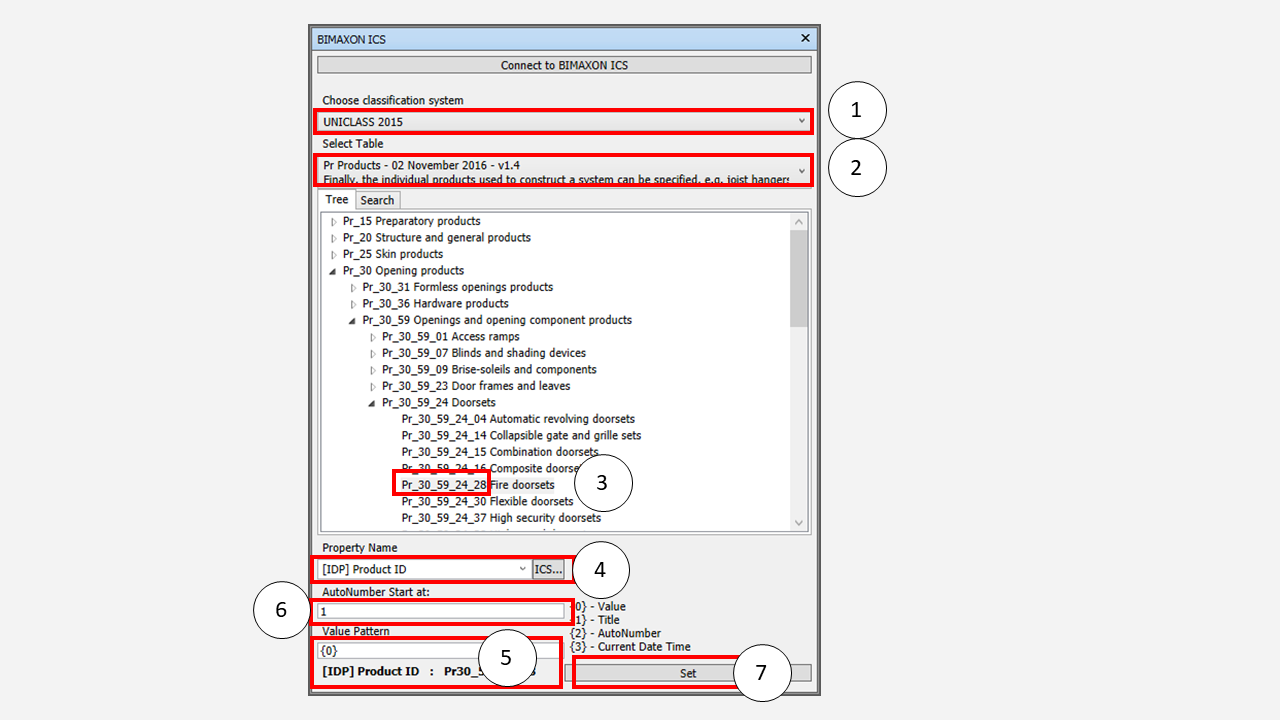
5. The Value text field allows you to create different types of property values.

6. Auto-numbering will start from the number entered in the AutoNumber Start at: field.

7. Click the Set button to set the values for your selected elements.

NOTE! Elements must be selected before adding a new property and value.

There are four types of scripts – {0}, {1}, {2} and {3} – to help you create combined values. You can use scripts within any word combinations. Simply write {0} and a tool will add to your chosen property value the index value of only the class selected in the tree. 


{0} – adds the index value of the class selected in the tree. 

{1} – adds the name of the class selected in the tree. 

{2} – adds a number to the last value. This lets you auto-number elements by increasing the previous number by +1.

{3} – adds the current date and time.

Some examples of how it works:

Script: {0} – Hello world 
Result: 23-17 13 15 23 – Hello world

Script: {0}-{1} 
Result: 23-17 13 15 23-Wood Casement Windows

Script: {1}  
Result: Wood Casement Windows

Script: %%%{0}-{1} 
Result: %%%23-17 13 15 23-Wood Casement Windows

Script: Hello{0} 
Result: Hello23-17 13 15 23

Script: Hello{0}world 
Result: Hello23-17 13 15 23world

Script: Hello {0} world 
Result: Hello 23-17 13 15 23 world

To fix the number of digits in the numbering script {2}, specify the number of digits with a :, the letter D and the number.

Here is an example for auto-numbering with three digits.

Script: {2:D3}

Result: 001, 002, … , 010, 011, … , 100, 101, …

And here is an example for a class title and auto-numbering with two digits.

Script:    {1}-{2:D2}

Result: Wood Casement Windows-01, Wood Casement Windows-02, … , Wood Casement Windows-10, Wood Casement Windows-11, … , Wood Casement Windows-99, Wood Casement Windows-100, Wood Casement Windows-101, …

Share This: